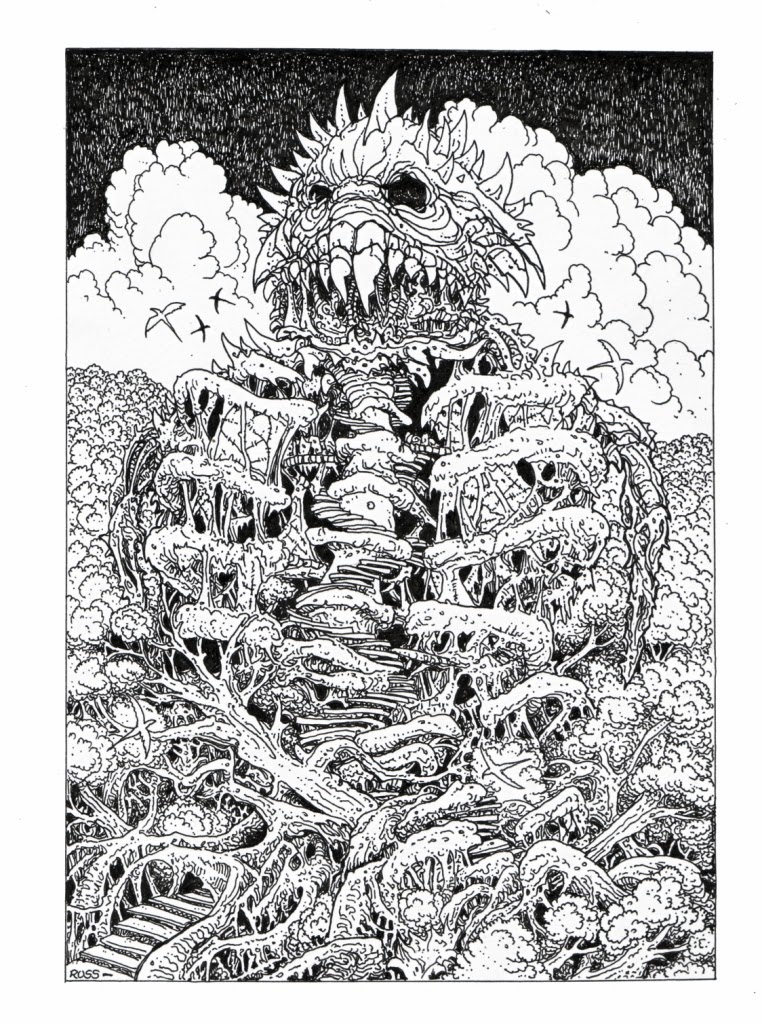
This circular room is 25’ feet in diameter with 12’ ceilings. On the east side of the room a staircase goes down. Dim light enters the room from two doorways to the exterior in the NW and NE side of the room, inscribed with faded runes. From them, stairs wind down along the exterior of the central tower. The NW stairs lead down to room 7 on Level 3. (Note that the final step into area 7 is trapped--see the description of area 7 below.) The NE stairs lead nowhere, having crumbled along with the eastern tower to which they once led.
Level 3
6. Open Room [Central Tower]
Dappled natural light spills into this large open room from two doors that lead out into the open ocean with views over the ruined debris of north and east towers to the base of the keep (Level 4). Fish swim freely through the space, and currents can be felt. (There is no silt on the floor here.) The west side of this room is largely taken up by a long stone table, inlaid with elegant tortoise-shell. Several remarkable chairs remain standing around the table: the opalescent shells of giant clams that have been fitted onto long bronze legs (200gp each, 3 total). On the east side of the room one small stone table remains, as well as some metal pokers. The secret door in the west wall of this room will is a door that pushes back and then slides along a track into the wall. It is now stuck and requires a bend bars check to open (or a combined strength of 30). It will not be easy to spot unless someone examines the wall closely. There is a 50% chance that the necrophidius is in his lair (7) and will emerge 3 rounds after the players enter the room. If not, there is a cumulative 10% chance per turn that it will return.
7. Rainbow Coral (Trap) [West Tower]
A set of wide copper pipes run down the west wall of this room from ceiling to floor. At the base of these pipes, a large rainbow coral has grown up that occupies the bulk of the western side of the room, partially blocking the steps going down. It emits a kaleidoscopic light. In this phantasmagoria, myriad fish swim and dart, traveling in and out of the open doors. It is truly a wonder to behold. The secret door in the eastern wall is clearly visible from this side. Two doorways, one NE and one SE, lead out to the steps that wind up around the central tower.
Having absorbed the mutagens from the leaky pipes, the rainbow coral possesses strange alchemical properties. If a piece of it comes into contact with a magical object roll on the following chart (d10):
- As it approaches the item, dazzling colored sparks fly between the two. If touched, they cannot easily be pried apart. (Bend bars check to separate them.)
- As it touches the item, the coral rapidly spreads like a fungus across and over the item, engulfing it. Before your eyes it gains in bulk and sprouts rocky tendrils. The coral will now grow at a rate of 1 cubic foot per turn. It will not be easy to extricate the item now with anything short of an acid bath.
- The item touched acquires a blackened look, while the coral pulsates with an inner light. It has absorbed the magical properties of the item. (If a potion, if can be consumed with the same effect, if a scroll, it acts as a ring of spell storing, etc..)
- The coral runs like a rainbow hued quicksilver, roiling over the surface of the object. Within 2 rounds it has been absorbed entirely by the object, which now has a rainbow sheen. The object is now more powerful.
- As it touches the object, the coral melts open. Within can be seen waving, layered cilia of a purple hue. Nestled in their center is a blackened nodule, like a dead black eye.
- As it touches the object, there is a horrible hissing sound, and a violet fluid sprays from the coral. Everyone in the area must save vs. breath weapon or be covered in a virulent mutagen. They should roll on this chart.
- As it touches the object, a beautiful sound fills the water (or air), like the unearthly strains of a distant harp. Both tremble, like the petals of flowers in the breeze.
- As it touches the object, a pulse seems to flow from the coral into the object. The object is now unstable. Whenever it is used roll d6: 1-2 Fails to function, 3-4 Functions normally, 5 Functions more powerfully, 6 Explodes causing 4d6 damage to those within 25'.
- When it comes into contact the object their is a flash and everything looks for a moment like the negative of a photograph. The coral is now inert, and the power of the item is reversed.
- White light explodes from the point of contact, blinding all those within 50' for 1d6 rounds. Both the coral and the item are now spent and blackened.
Wizards and alchemists would pay a fine price for an active chunk (1000gp for a single large chunk; the entire coral would fetch 10,000gp). Unfortunately, the coral is difficult to transport and highly dangerous. If simply broken off and exposed to air, a piece will harden and the magical properties will fade within one week of being harvested. To transport successfully with powers intact, the coral will have to remain in a tank with salt water, in close proximity to a constant source of magical power. (It will drain the magic from an item placed in a tank within 1 week.) Furthermore, those within 100' of the coral over an extended period of time, must save vs. poison or roll once on Logan Knight's
Transmutation Table.
The staircase from the SE goes up to area 5 in the South Tower. Anyone who looks carefully at the bottom step in front of the SE door will notice a faint rectangle of runes inscribed within the stone. From the rectangle rises a 3'x3'x7' trapped area in the water in front of the door. Any human (or demi-human) sized object passing through this cube will trigger the trap, which causes the water in the warded area to instantly boil, causing 4d6 damage, save vs. breath weapon for half. There was an identical trap at one time on the NE doorway, but the top step has cracked and crumbled as the stairs collapsed, and the magical ward was broken. The room can be safely entered through this door.
8. Lair of the Necrophidius [South Tower]
The floor of the room is littered with bones of various sizes. There is a particularly large pile along the south side of the room, and the light glints of several objects with the refuse. This is the lair of the huge Necrophidius that prowls the spire. There is a 50% chance that is here, and if not, a cumulative 10% chance per turn that it will return. The pile contains a bunch of a bunch of ancient Ghinorian cookware (20gp), and coins (10gp).
Necrophidius HD3 (24) AC2 Att: Bite 1d8+save vs. magic or be paralyzed for 1-4 turns. Special: +2 on surprise rolls, immune to sleep and charm, and may perform the dance of death: all viewing must save vs. magic or be hypnotized and rendered defenseless.
Level 4
9. Entertaining Room [Central Tower]
The room contains several basalt statues, one of an octopus, another of snakes, and a grotesque bust. Scattered around the room, there are some low marble tables, including one inlaid with a made topaz chessboard (100 lbs, 200gp). Strangely, there is also one intact wooden chair, the back of which is carved with a face blowing wind. Sarpedon used this chair to spy as on his visitors, as he entertained them with his ostentatious hospitality and empty pleasantries.
This chair allows the one sitting in it to read the thoughts of all within 100' at will (saving throw to resist) three times a day (10 rounds duration per use). The chair may be moved anywhere within the Submerged Spire, but if taken outside, its enchantment will be forever broken. If employed in range of a being held in stasis, a still and silent presence will be noted.
10.
Base of the West Tower (Trap)
Light trickles in from an open doorway, leading to the open surface of the top of the keep. Wide copper pipes run from the floor to the ceiling by the door on the west side of the room. Anyone who looks carefully at the roof of the keep directly in front of the door, will notice a faint rectangle of runes inscribed within the stone. This is a potent magical ward protecting the West Tower and the pillar housing the mutagens (area 7) from intruders. From the rectangle rises a 3'x3'x7' trapped area in the water in front of the door. Any human (or demi-human) sized object passing through this cube, will trigger the trap. A tremendous force will push the being upwards in a column of water, sending him all the way to the surface and 30' into the air. He must then save vs. paralysis. If he fails, he will black out for 1d10 rounds from the rapid change of pressure and the force of the impact when he hits the water on the return, taking 2d6 damage in the process. If he makes his save, he will retain consciousness and suffer only 1d6 damage. Any gear worn on his back or about his person will be thrown off, scattered and fall back into the sea, landing in a wide area. If he is going light, then he will float on the surface of the water and need to make his way back down. If he is going heavy, he will probably sink back to the bottom 100' from the keep in a random direction (d4: 1 North, 2 South, 3 East, 4 West). After the trap is triggered, there is a heartbeat before it resets. During this time it is possible to cross, if one moves very quickly. The player should make a dexterity check with a -4 penalty if he is
going heavy, and no penalty if
going light.
11. Base of the South Tower (Empty)
This circular room is 25’ feet in diameter with 12’ ceilings. Light trickles in from an open doorway, faintly inscribed with runes, leading to the open surface of the top of the keep. Within the SW of the room, a staircase leads up to area 8. There is a large fireplace built into the west wall that vents through a magical flue. Sitting in the fireplace is a huge copper cauldron, stained a deep green. Other cookware is scattered throughout the deep silt on the floor of the room.
12. Base of the East Tower (Empty)
Light trickles in from an open doorway, faintly inscribed with runes, leading to the open surface of the top of the keep.Within the SW of the room, a staircase formerly led up into the East Tower. The ceiling is partially collapsed from the crumbling of the floors above, and stone rubble now chokes the stair, spilling into the room. This was once the wine cellar. A few bottles protrude from the thin layer of silt that lines the floor. They are filled with a sludgy residue and will shatter if handled.
13. Base of the North Tower (Lair of the Cenarachs)
Light trickles in from an open doorway, faintly inscribed with runes, leading to the open surface of the top of the keep. On the eastern side of the room, a staircase formerly led up into the North Tower. The ceiling here is partially collapsed from the crumbling of the floors above, and stone rubble now chokes the stair, spilling into the room. Starting 5' into to the room, thick white strands of viscous material run, crisscrossing from this rubble and fallen masonry, to the walls, forming a webbed interior. Suspended, nestling within the webbing, can be seen several white pods, roughly man-sized. Bones litter the floor, and among them there is a glint from metallic objects.
This room is the lair of three Cenarachs, one of Sarpedon’s blended monstrosities. They have a human form, bent over backwards. From the base of the spine, think spider's legs emerge. The top of their head opens into a spidery maw, and above it are set eight black eyes. They cannot swim, and can only travel like crabs along the floor, or like spiders up a wall. They are intelligent and filled with hatred. There is a 50% chance that 1-3 are present in lair. For each turn spent in the room there is a cumulative 10% chance 1-3 will return. If one is attacked, it will send a telepathic call for help to the others, who will return in 1-6 rounds.
Cenarachs HD4 (16, 18, 20) AC6 MV12" Att: Bite 1d6+poison save or die. The pods within the webbing contain corpses (one small shark, one sahuagin) in which they have laid a brood of eggs. Their treasure trove, scattered amongst the bones, includes a nearly complete set of fine silverware, the handles of which are engraved with octopuses (200gp), a ring set with a decent topaz (70gp), and a smattering of ancient gold coins, stamped with a ziggurat (100gp).
The Keep (Level 5)
The keep is the heart of the dungeon. It consists of the living quarters and mad laboratories of Sarpedon the Shaper. It is home to his most powerful guardians and his strangest creations. Note that the western wing of the keep is not submerged. Nor are areas 21 and 22, at least not initially. In these magically protected air pockets, PCs may breath air as usual. I include here another copy of the map, so you don't have to scroll quite so much.
14.
Central Hall
This massive hall was once the main entry into the Spire. The ceilings are 20’ high, it is 100’ long and 30’ wide. Currents can be felt moving through the water here. In the center of the hall a spiral staircase winds up. At either end of the hall stand two massive portcullises, rusted into place. In front of the Southern portcullis, a massive figure stands facing out through its bars. He wears a black hooded cloak and seems to arise from a bewildering mass of tentacles. He is holding a silver spear in one hand. A blue shimmering cube surrounds him, as though he were within a flickering box of blue glass. [If the north portcullis is viewed from the exterior of the keep, this unmoving figure can be seen to wear a featureless silver mask.] This is the The Tentacled Guardian.
The three openings on the west wall shimmer blue. Beyond them can be glimpsed dry corridors. Along the east wall, only the north most opening shimmers. On the east, through all the openings, the same watery environment in the hall is visible. Should any of the blue shimmering fields in the hall be breached, the stasis field surrounding the Tentacle Guardian will drop. He is under a potent geas to pursue and kill intruders. He will take 1 round to shake off his torpor. At this point he will turn and face the hall. If he can see the PCs, he will move to attack. If none are visible, he will travel swiftly to area 15 in order to release the Bulbous Toucher, the Ctenophoric Maiden, and the Star Maw. They will then hunt the intrudes as a freakish pack. They know the layout of the keep and will use it to their tactical advantage, seeking to surprise the intruders, or drive them into an ambush.
 |
| Chris Burdett |
Tentacled Guardian HD8 (40) AC2 Mv15' Att: Spear/Tentacle/Tentacle (1d6+4/1d4+2/1d4+2) + squeeze. On a successful tentacle strike, the victim must save vs. paralysis or be constricted and receive automatic damage from a tentacle strike every round until dropped. The Tentacled Guardian wears the Mask of Horrors, which is silver and featureless. The mask has 6 charges. Using its mask it can use each of the following spells as though cast by a 12th level illusionist: Fear (1 charge), and Phantasmal Killer (3 charges). The silver spear is wondrously wrought: up its shaft curl vines and leaves in a fine silver filigree. It will never rust, age or break. (700gp)
15. Hall of the Bio Horrors
This room is 30x25 with tall ceilings. There is a stone table running along the north wall, in which a large ball of polished pink quartz has been set. Five ornately carved basalt pedestals stand along the west wall. On three of them a shimmering blue cube encases a stationary form. The other two are empty.
Pedestal 1: Over the first pedestal, a huge black starfish floats, suspended in air. At the spots where its legs meet, a ring of mouths lined with teeth like needles can be seen. Star Maw HD4 (20) AC4 Mv 12' Attk: Slap/Slap d6/d6 + Grab. When the starfish scores a hit, the target must make a dexterity check, or be pulled towards its ring of maws. If he fails the check, on the following round the star maw may sacrifice one of its attacks to deal him an automatic d12 damage. The Star Maw can feed up to two targets to its maw simultaneously.
Pedestal 2: Above this pedestal, a beautiful female body floats. From the mouth up, it appears that a jellyfish covers her head, with its tentacles curling down around her neck and torso.
Ctenophoric Maiden HD2 (10) AC6 Attk: Stinging Tentacles 1d10 or mind powers. The Ctenophoric Maiden may use the following mind powers once per day: (1) Levitate, (2) Hold Person, (3) Magic Missile (2d4+2).
Pedestal 3: From a misshapen and bulbous head, the white tentacles of this giant squid dangle, ending in what look like the hands of a child.
Bulbous Toucher HD4 (20) AC5 Attk: Shocking Touch 1d8/1d8/1d8.
If someone touches the quartz ball, lights will begin to flicker within it. Roll d6:
- Stasis field on pedestal 1 drops
- Stasis field on pedestal 2 drops
- Stasis field on pedestal 3 drops
- All stasis fields drop
- Stasis field rises over the empty pedestal 4
- Cracking and popping sound at pedestal 5, followed by an electrical explosion, 3d4 damage in a 20' radius, save vs. breathweapon for 1/2.
The creatures in stasis are all under a strong geas to hunt and kill any intruders to the keep. If any of the stasis fields are dropped, its occupant will attempt to free his peers for help. If given the chance, the group will also release the Tentacled Guardian in area 14 by breaching his stasis field. This pack of monstrosities will then relentlessly hunt the PCs.
16.
Materials Workshop
A bewildering array of corroded metal objects poke up through a deep layer of silt (3') in this big room (3'). Digging through them is timely, since doing so will quickly stir up the silt, and occlude vision. A quick search will reveal useless items such as the corroded remains of metal tools (bone saws, hammers, etc.) , corroded piping, spools of copper wire, etc. A more methodical search over three man-turns, will turn up the following (semi) valuable objects: hatchet with a pearl handle (25gp), a round saw blade that is tarnished but intact (75gp), and an iridescent sealed metal tube (empty but waterproof, 100gp).
17.
Container Storage
Along the west wall metal cubes are stacked. These metal crates have rusted shut, and may be broken open with some forcing. Most are empty, but a few contain 1d4:
- Empty glass balls with screw in metal stoppers
- Small lead rods (corroded)
- Ceramic jars filled with bitumen
- Skulls of all shapes and sizes.
Against the south wall, four large, corroded metal capsules rest on the floor. They are roughly the size of coffins (8' in length). Their tops are set with glass windows at the point where the head would lie. This glass is cracked in three out of the four. These capsules are filled with water, and seaweed. The fourth is intact, and inside an empty dry space can be seen. At the foot of the capsules, two polished balls of quartz are set, one pink and one yellow. These controls are inert in the three cracked capsules. Touching the pink quartz in the intact capsule will cause it float to shoulder height (5'). At this point it can be moved by gently pushing it along, no matter how heavy its load. (Otherwise, they weight 700 lbs each and are very difficult to move.) Touching the yellow quartz will cause the capsule to open with a hiss, the top swinging on a hinge. If it is opened in the water, it will fill quickly, and the controls will pop and cease to function. If opened in a dried environment, it can be resealed by snapping the lid back into place. Previously, these were used by Sarpedon to transport living beings or materials between the then dry east and west wings, through the then submerged area 14.
18. Scribing Station
This 20x20 room is covered in a layer of deep silt (3'). A fine stone archway leads into area 19. If examined, metal brackets that once supported shelving can be seen protruding from the south and east wall at regular intervals. Searching in the silt will quickly obscure vision and is time consuming. But 1 man-turn (10 min) of searching will turn up antique writing instruments: a bronze stylus (5gp), a lead inkwell engraved with flames (30gp), and 5 unused wax tablets (15 gp).
19. Library
This 15x30 room is covered in a layer of deep silt (3'). Fine stone archways at either end lead to areas 18 and 20. Several layers of built in stone shelves line the east and west walls. Moving through the silt or searching in it produces clouds that reduce visibility. Searching from 2 man-turns (20 min) will turn up a wax tablet containing a Web scroll. Unfortunately, the silt here is infested with red parasitic worms. 1 in 6 chance of being infected for each round spent moving through or searching here. Treat as Rot Grubs.
20. Reading Room
This 25x15 room has a fine stone archway leading to area 19, and an opening to the passageway to the east. The eastern wall has built in stone shelves at a variety of heights. In the middle of the room, there is a stone divan. Incongruously, in the northern wall a thick wooden door still stands. It is elaborately carved. In its center is set a grotesque face, from the tongue of which a metal knocker depends. It has no handle, and is set into the stone.

This door blocks the way into Sarpedon's Special Library. It has a permanent 16th level wizard lock set on it. Using the knocker will cause the mouth to ask, "Through the splendid might of his potent sorcery, what has Sarpedon the Shaper mastered?" The correct answer is, "The principles of life." If the correct answer is not spoken within 1 round, the eyes of the face in which the knocker is set will fire purple beams that strike for 3d6 damage (save vs. wands for 1/2). It will also drop the stasis field around the Tentacled Guardian in area 14. Although they are massive, with enough work (10 man hours) the stones around the door can be loosened enough to remove the whole door. Note that opening the door, or loosening surrounding stone will fill area 21 with water.
21.
Special Library
This 15x25 room is dry and filled with breathable air. A large wooden door, with grotesque carvings on it leads south to area 20. (From this side it opens by turning a handle.) To the north, the secret door in 22 is clearly visible, appearing as a plain wooden door. The east wall has built-in bookshelves, which are filled with tomes of all shapes and sizes. The bottom shelf has numerous rolls of parchment resting on it. Along the western wall there are several beautiful wooden reading chairs, with rotting cushions and small reading tables. The middle of the room is occupied by the statue of an octopus supporting in its eight arms lanterns held at various levels. If these lanterns are touched, they will glow with a warm light. (They can be broken off, and will continue to glow for 1 hour before going dark forever.)

The special library was sealed to the outside elements by the magics protecting the doors to the north and south, and so remained dry when the barriers failed and the rest of the east wing became submerged. If either of these doors are opened, water will rush into the room, filling it floor to ceiling in 1 minute. Those opening the door must make a dexterity check or find themselves washed, head over heels, and thrown, disoriented about the room (1d4 dam, and 1 round recovery). Unfortunately, the ancient parchments and precious manuscripts in the room will not be able to withstand a rough immersion in salt water. If sturdier manuscripts are immediately hauled to a dry space (for example in the west wing), the DM may allow some portion of a few texts to survive, at his discretion. But if drastic and immediate action is not taken, you can assume that nothing from the following list survives.
Here is what the shelves contain
- Reference works, some otherwise lost, on naturalism, alchemy, geology, demonology, divination (10,000gp total, an unbelievable addition to a wizard's library).
- Works of history and poetry written during the age of the Sorcerer Lords, some otherwise lost (1,000gp)
- Spells scattered throughout myriad books of diverse appearance, containing numerous spells [my players failed to acquire these, so I haven't recorded them yet]
- Twelve scrolls [ditto]
22.
Control Room
This 15x15 is dry and the air is breathable. However, as in area 21, if the PCs enter the room by opening a door from a submerged area (e.g. 23), then the room will fill up rapidly with water. The secret door from room 23 is plainly visible here, appearing as a stone door with a handle. (Touching the handle causes the door to melt away, as in area 23.) In the NW corner of this 15x15 room, there is an L-shaped stone table, into which 3 balls of polished quartz have been set: (1) Yellow with red streaks, (2) Grey, (3) Pink. The south wall has a bust of Sarpedon. He is very handsome and wears a smirk on his face. Pushing in one of Sarpedon's eyes opens the secret door to the south that leads into area 21. If a PC touches one of the crystal balls, then it will begin to hum, and lights will rise from its depths to flicker across its surface. Here are the effects of touching them.
Ball 1: This is a viewer. The PC should roll a d30. He will see a vision of the room of that number as it currently is. This effect may be repeated indefinitely. Of course, nothing will indicate where the room is, if the players have not yet visited it.
Ball 2: This ball operates the blue shimmering curtains that appear throughout the complex.When touching it roll d6. Note that to the PCs, it will seem that nothing has happened.
- The stasis field on the Tentacled Guardian in area 14 drops.
- All the stasis fields in 15 drop.
- One of the shimmering curtains in front of the passages drops in area 14. Roll d4 to see which one. If it is a curtain in front of a passage in the west wing, that wing will fill with water within 1 turn (10 min)
- Nothing happens
- Nothing happens
- Nothing happens
Ball 3: This ball operates the Spire's d
efenses. When it is touched, the PC should roll d6. Note that this will have no apparent effect.
- Disarms the trap on the stairs from area 1 to 2.
- Disarms the traps guarding the West Tower (see areas 7 and 10).
- Disarms the lasers on the door in area 23.
- Nothing happens
- Nothing happens
- Nothing happens
23.
Storage
This 15x20 room is empty. On the east wall, an ornate metal picture frame still stands bolted to the wall, although the picture itself was destroyed long ago. The frame is decorated with the sun, moon and stars. Pressing on the sun causes the secret door to area 22 to open--the wall literary melts away revealing the room. (Note that this will submerge area 22.) A search in the silt reveals odds an ends--a corroded metal brush, a queer copper bandolier, some empty jars.
24.
Privy
This room contains two privies. Along the east wall, a stone table is set into the wall. Over a copper basin stained with verdigris a faucet emerges from the wall. The faucet no longer functions
West Wing (Areas 25-32)
25.
Bone and muscle workshop
This 40x25 room was one of Sarpedon’s main workshops, dedicated to the creation of biological wonders. To the east, beyond a shimmering blue curtain, the water of area 14 can be seen, as though through the wall of an aquarium. A stone arch leads south, and a fine wooden door is set in the SE wall. The room has a pungent, acrid odor.
Running up the long north wall, there is rack upon rack of orderly arrangements of bones and skulls of every imaginable shape and size. The more unusual pieces are set in brass frames. From within glass cases, skins of diverse kinds are stretched, including one from which hanging faces peer.
In front of this strange display, a massive heavy wooden worktable stands, on which are laid various odds and ends of bones, wires, tubing, and fine metal tools (200gp).
In the north west corner of the room an old, wooden grandfather clock stands. The face of a satyr glowers down form the top, and a glass door shows the pendulum within, which no longer swings. Springing the glass case opens the secret door to area 32. Along the south wall, west of the stone arch, three large (5' tall, 5' diameter) stone tubs stand. Hanging from racks on the wall are a variety of large tools: long handled spoons and tongs, huge metal pans, a massive stretching rack, saws. If approached, the pungent odor in the room seems to be emanating from the tubs. They are storage for enchanted muscle cultures. For centuries these cultures have been roiling within them. The central tub has given rise to the horror known as Muscle Jelly. If approached it will rise up and attack.
 |
| Janjetov |
Muscle Jelly HD12 HP60 AC10 SPD15' Att: Slam 1d8+4, save vs. paralysis or be stunned for 1 round by the immense blow. Immune to mind affecting spells.
26.
Costume Room
This holds the costumes with which Sarpedon delighted in dressing his creations. Wooden manikins of all sizes stand in rows, dressed in elaborate antique fashion drawn from diverse cultures. Bins of hats, many outrageous, piles of sashes and epaulets, and footwear of all kinds stand in neat rows. Although once nearly priceless, these sartorial splendors are now all ruined. Along the south wall stand a few suits of armor, and a rack with some arms. None are magical, but some are of fine construction. Alongside normal fare, more weighty than valuable, the notable items include:
- Two suits of plate mail. The more elaborate of the two has a bronze helm that reveals only the eyes, and is sized for an ogre. (500gp)
- Two shields. One is a kite shield, resplendent with the stylized image of a rising sun against which the black lines of twisted trees stand in sharp relief. (100gp) The other is an ingeniously designed buckler in the center of which a lantern has been set. (50 gp)
- a matching pair of queer short swords, the handles of which are grotesque yawning faces. (75gp)
- a polearm fit for a giant
On a long shelf in the NE corner of the room, an arresting row of masks are mounted on wooden busts. Some are imitations of animals, real and invented. Others are grotesque faces, or elaborate ceremonial masks from religious orders now forgotten. The more valuable masks will be difficult to transport without damaging, but if a means could be devised, will fetch up to 700gp from collectors. Mixed among this lot are two masks of a forbidding magical nature.

This serenely smiling golden mask is the Interrogator. When donned, hooked barbs spring from the inside of the mask, binding it to the face of the wearer (1d10 damage, -2 charisma permanently). While the mask is attached, the wearer cannot utter any lies. Only another person can make the barbs retract, by placing his hand on its forehead and uttering the sentence, "I am finished with him". Tearing off the mask does 3d10 damage, and leaves the face horribly scarred (-4 charisma). The mask can be used five more times before its enchantment expires.
 |
| Micah Vogel |
This queer double mask is the Mask of Hidden Wrath. The exterior of this wooden mask is the face of a remarkably carved eagle. But within the mask lies another, a reddened, swollen, rage besotted human face. As soon as the wearer dons this mask, it will snap shut. It will only open if he enters combat. When the mask opens, the wearer will enter a rage, receiving +4 to his strength for the duration of the combat. However, there is a 1 in 6 chance that he will also lose control, attacking friend and foe alike. The mask has four charges remaining.
27.
Baths
This room has a handsome wooden door (unlocked) to the north, and a stone archway leading south into area 28. The west end of the room is occupied by a huge white marble tub. Two silver spouts emerge from the wall above the tub. These spouts magically produce hot and cold water when touched. The east side of the room is occupied by a vanity. The mirror is huge and supported by baroque gold plated fastenings. In front of it there are various jars formerly containing cosmetic salves, powders and ointments, all of which have been reduced to a hardened paste. Inside a drawer there is a silver comb (50gp).
28.
Wardrobe
This is an elaborate walk-in closet. All manner of fine robes, dressing gowns, vests, caps, shoes, belts, hang from racks in immense wardrobes. Although once valuable, these clothes are now in ruins. (A few dry outfits can be cobbled together.) In the center of the room stands a tall mirror, surrounded by filigreed silver satyrs (200 gp, but heavy and fragile). A jewelry box rests on top of a cabinet. The clasp is trapped with a poison needle, but it has lost its potency. Within there is a thin gold circlet set with fire opals (500gp), a silver ring ostentatiously flashing with diamonds (1000gp), a scarab broach inlaid with lapis lazuli and mother of pearl (200gp), and a gorgeous bronze bracelet of intertwining serpents with carnelian eyes (400gp).
29.
Master Bedroom
The elegant door to this room is lacquered black with seahorse motif in gold leaf. The dust covered floor was once a gleaming cherry, and the faded oriental rugs were lustrous. In the western end of the room, a massive four-poster bed rests, draped with rotting white silk. A book lies open on a night table by its side. It is an old edition of a work of poetry still read in the present day. On the east side of the room there is a white divan and some plush sitting chairs. In the corner, as in area 22, there is a metal statue of an octopus, each of its limbs supporting a lantern that will light if touched. In the center of the wall, there is massive fireplace, in which a single log sits. Next to is a box long matches. If lit with these matches, the log will immediately spring into flame, giving light and warmth, but no smoke. (There is no flue.)
30.
Laboratory
The door to this room is made of heavy wood, and has a grotesque face from which hangs a knocker (as in area 21). However, the door is slightly ajar and can be opened easily. Apart from a central walkway through the room that ends in an unlocked wooden door (leading to area 31), the room is entirely occupied by a a maze of open shelving. On these shelves sit the strange tools and materials of Sarpedon's forgotten art. On one shelf, the preserved specimens of alien of creatures lear from within a tank, on another shelf fetal anomalies float in brown liquid baths, another seems to contain jar upon jar of pickled organs, another contains jellies of dazzling colors, and so on.
Contained here are spell components and alchemical materials; although many have been spoiled, a discerning eye find quite a few useful items (1000gp total). The following magical items can be found here as well. (Note that detect magic will be useless here, as pretty much everything will light up.)
- A small box containing Jade Powder (2 doses): when snorted acts as 10th level haste spell
- A sealed ceramic jar containing Luminescent Oil (5 doses): liquid daylight as cast by 15th level cleric
- A small jar with a tiny spoon containing 10 doses of Blackseed Poison. These tiny black grains dissolve in food or drink. If consumed, within a week, gestating black worms fill the victim's stomach and devourer his internal organs.
- Various poisons, some described on the chart below
- 3 Blue Algae Tins
- Solvent of Androgyny*
- Lenses of the sub-world*
- Egg of life*
- Hive seed*
* These fabulous items are presented in
+Gavin Norman's
The Complete Vivimancer
If the PCs are hastily searching, you may roll on the following chart for every minute spent looking d20:
- Jars containing conjoined fetal twins.
- Boxes containing numerous powders (including Jade Powder and Blackseed Poison, the others are inert)
- Still beating black heart preserved in a transparent gelatinous mixture
- A set of shelves that has been overrun by a virulent yellow mold that escaped long ago from its petrie dish. Save vs. poison or begin coughing up blood. Unless cured, the infection will only get worse, resulting in something like this if not treated within a week:

- Dried eels
- Numerous tins, including the Blue Algae Tins
- That tongue
- Shelf of dried out aquariums caked with a brown substance
- Those colored skeletons
- A sealed crystal cube, in which transparent worms are consumed by frantic black insects, that give birth and become worms themselves, repeating the process over and over again
- Colored jellies (not edible)
- A terrarium, filled with mushrooms and buzzing black flies. These carnivorous mushrooms are covered with gooey deposits that feed the flies. Every once in a while, a mushroom extends a psuedo-pod, snagging a fly and pulling to the underside of the cap, where it disappears.
- Individually wrapped, dried cubes (not unlike sugar cubes): exposed to liquid, they will become 1 cubic foot of flesh.
- A glass cube, the two halves of which can be separated. In the middle is a tiny seed, in which minute insectoid forms can be glimpsed. This is the Hive Seed.
- Tiny pickled brains, suspended in a thick solution.
- A pallet of flesh from which black hairs grow. They wave and reach towards the light.
- Lead jars filled with Black Puddings
- A fleshy plant with sickeningly sweet white flowers that has burst the confines of its pot and now occupies a chunk of territory in the room. What is it eating so noisily?
- A single black egg. This is the egg of life whose potent fertility defies the wildest imagination.
- A small tub of what looks like liquid mercury. It is a potent toxin that seeks out organic matter. If touched to flesh, it will flow rapidly along it, into the orifices and consume the body from within.
31.
Blending Chamber
This western wall of this large room is taken up by a tiered raised dais, on which rests a strange apparatus. On the left and the right, at the first level, two rune covered crystal coffins lie (12' long). Empty glass tubes protrude from these coffins with plungers, like giant syringes. Between them, on a higher platform, rests a marble coffin with a heavy lid, down the center of which a long crack runs. Thick copper pipes running from the ceiling terminate in the two glass coffins. Copper pipes then run from these coffins into the sides of the central raised marble coffin.
Facing this apparatus, sits a rune covered chair, carved from a single piece of onyx. Attached to the chair is a bronze helmet that can be lowered over the sitters head. Before it is a low stone table, in which are set three crystal balls, all of polished topaz. Along the eastern wall, sit numerous alchemical appurtenances, alembecs, retorts, athanors, and so on. In the northeast corner there is a small washbasin, with gargoyle spout. The secret door to 32 is sprung by depressing the tongue of the statue.
If the crystal coffins are examined, built in restrains can be seen within. Their bottom appears to be caked with a brown residue. The lids are extremely heavy, but can be removed by several people working together. If the central coffin is examined, through the crack a blackened interior can be glimpsed. Should the broken marble lid be pried off, it will be clear that the lid and the base fit together like a mold. The mold appears to have been of an angelic figure, perhaps 8' tall, with four feathered wings. The face is exceedingly beautiful with a third eye its forehead. Both sides of the mold are blackened, as if by fire. The lid seems to have been cracked from within.
Should one of the PC's sit in the chair, don the brass helmet, and touch one of the crystal balls then (and only then) will lights well up from within them, flickering across their surface.
Crystal ball 1: A thrumming begins, as the mutagen from the pillar in area 7 flows through the copper pipes into the southernmost crystal coffin. Green gasses begin swirling in this coffin and lights pulsate along its sides. If the lid is not on, then the gasses will pour into the room. This acts as a stinking cloud, effecting everyone in the room. People caught in the area must also save vs. poison or make 1 roll on Logan Knight's
Transmutation table.
Crystal ball 2: A thrumming begins, as the mutagen from the pillar in area 7 flows through the copper pipes into the northernmost crystal coffin. Green gasses begin swirling in this coffin and lights pulsate along its sides. If the lids are not on, the effect will be as above.
Crystal ball 3: Activates the mold. If any gasses are in coffin 1 and 2, they pour through the copper pipes connecting the crystal coffins to the central coffin. Bright lights streams from within the marble coffin. If the lid is off the effect will be as above. If it is on, the lid will fly off. Everyone within the room must save vs. breath weapon or suffer 4d6 damage from shooting marble debris. This will be followed by the stinking cloud effect.
Should the players think to do the same with biological forms strapped into the crystal coffins, then the DM should feel free to have a creature from his worst nightmares climb from the ruins of the marble coffin instead.
32.
Secret Passageway
This is a dark passageway that allowed convenient access from the Muscle and Bone Workshop (area 25) to the Blending Chamber (area 31). The secret doors are apparent and can be opened easily. Midway in the corridor, there is a high shelf on which a tome rests to which Sarpedon ofte refenrred while working. This is a complete early edition of the
Hidden Metamorphoses, which contains strange and perilous secrets of the forgotten art of vivimancy.